Here is a tasty fondant recipe that is not difficult to make. The yield of this recipe will cover and simply decorate up to 10” cake, 4 inches high. Makes approximately 36 ounces.
Assemble all of your ingredients and tools. Read through the entire recipe before beginning.
Ingredients:
1 Tablespoon plus 2 teaspoons unflavored gelatin (an envelope of unflavored gelatin contains 1 Tbsp.)
¼ cup cold water
½ cup glucose*
2 Tablespoons solid vegetable shortening
1 Tablespoon Glycerin (edible glycerine, from Cake Art)
1 two-pound bag of confectioners’ sugar
Decorating color, if desired
1 teaspoon of clear vanilla, almond or lemon flavoring
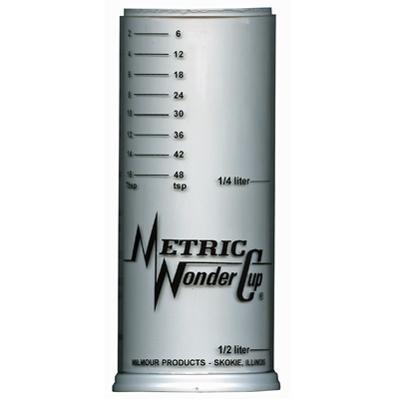
*The best way to measure your glucose is to use a Wonder Cup. Spray it or your measuring cup and any other utensil (i.e. spoon) with non-stick cooking spray beforehand. Glucose is the stickiest!
Tools Needed
: 
2 cup glass measure
Spoon
Pot or small saucepan
Measuring Spoon or Wonder Cup
Large bowl
Wooden Spoon
Plastic Wrap
Re-sealable food storage bag or container
1. Measure out all of your ingredients before starting. Place water In a 2 cup glass measuring cup. Sprinkle gelatin into the water in a thin stream, trying to avoid “clumps”. After about 3 minutes, the gelatin will have absorbed the water and be thick.
2. Fill a shallow pan with approximately half an inch of water. Place on the stove over low heat. Place the measuring cup of gelatin in the pan. Stir gently over heat until gelatin is completely dissolved. Add glucose, mixing well. Stir in the shortening. As the shortening melts, remove from the heat. Add the glycerine, flavoring of your choice and any desired coloring, should you choose to color the entire batch. Allow to cool until lukewarm.
3. Place half of your confectioner’s sugar in a large bowl. Make a well in the center of the sugar and pour your gelatin mixture into it. Stir with your wooden spoon, stirring all the sugar in the bowl into the gelatin until combined. Add more sugar, little by little until the dough you are making isn’t sticky any more.
4. Lightly dust your work surface with some of your confectioners’ sugar and scrape all of the fondant dough on the surface... After removing any jewelry that might hold the fondant, apply a light coating of shortening to your hands. Knead the fondant, using your best play-dough or bread kneading technique until the dough is smooth and pliable with a satiny finish. You should be able to poke your finger into the dough and pull it away leaving an impression but not sticking to your finger.
5. If the fondant is still too soft, you can knead in more sugar, but be careful; you don’t want to make it too stiff. Once you are happy with the texture,
wrap completely in plastic wrap- it must be air tight and allow it to rest for 1 hour.
6. At this point, your fondant is ready to use. If you are coloring only a portion of your fondant, you may do so by dipping your toothpick into the coloring of your choice and swiping it across the fondant. Pull and stretch the fondant until color is completely blended in. Another option is to knead in a portion of colored fondant to create the shade of your choosing.
7. Be sure to keep the fondant covered while waiting to use it to insure it does not dry out.
8. If not using immediately, very lightly coat with shortening and wrap airtight in plastic wrap. Place this in an airtight container or freezer type re-sealable bag, pressing out all the air possible. If you have a vacuum type food storage system, this would be ideal. If storing for more than a week, store tightly sealed fondant in the refrigerator. Bring to room temperature before opening or kneading. Do not freeze. Once at room temperature if fondant seems a bit dry, knead in a small amount of vegetable shortening.
comments powered by Disqus

